3 minutes
Rancher for Microservices : Load Balancing and Scaling Containers.
In my previous post, we saw how easy it is to set up Kubernetes cluster using Rancher. Once you have a cluster up and running, next step is to deploy your microservices on the cluster. In this post, we’ll look at how to deploy, run and scale a docker image on your cluster. We’ll also look at setting up an L7 load balancer to distribute traffic between multiple instances of your app.
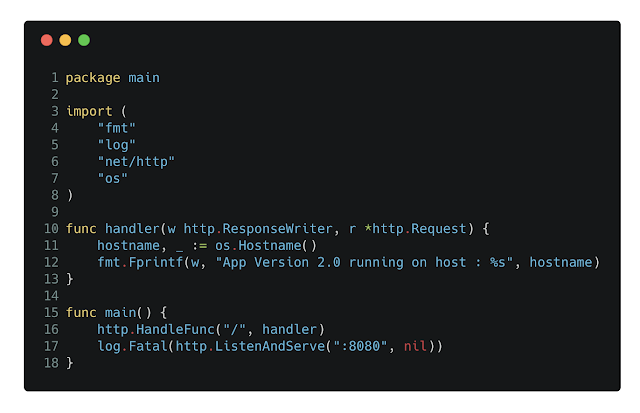
Let’s create a simple HTTP service which returns server hostname & current version of the binary (hardcoded). I’ve used go-lang for this, below is code snippet which returns hostname and service version.
Simple HTTP Server, return app version & hostname.
All it does is, returns a string “App Version 2.0 running on host: ”, once deployed it will return container hostname.
Next step is to dockerize our service by generating a docker image and push it to DockerHub (or your private Docker registry), below is Dockerfile I used to dockerize this service.
Dockerfile: run “docker build -t ravirdv/app:v1.0 .”
Running this will compile our service and generate a docker image on local machine. Version number is generally used to tag docker image so we’ve tagged it as v1.0.
We can push this image to DockerHub using following command : docker push
You can access this image from https://hub.docker.com/r/ravirdv/app/, there are two tags i.e. 1.0 & 2.0
Now that we’ve our shiny app on the docker repository, we can deploy it on our cluster via Rancher.
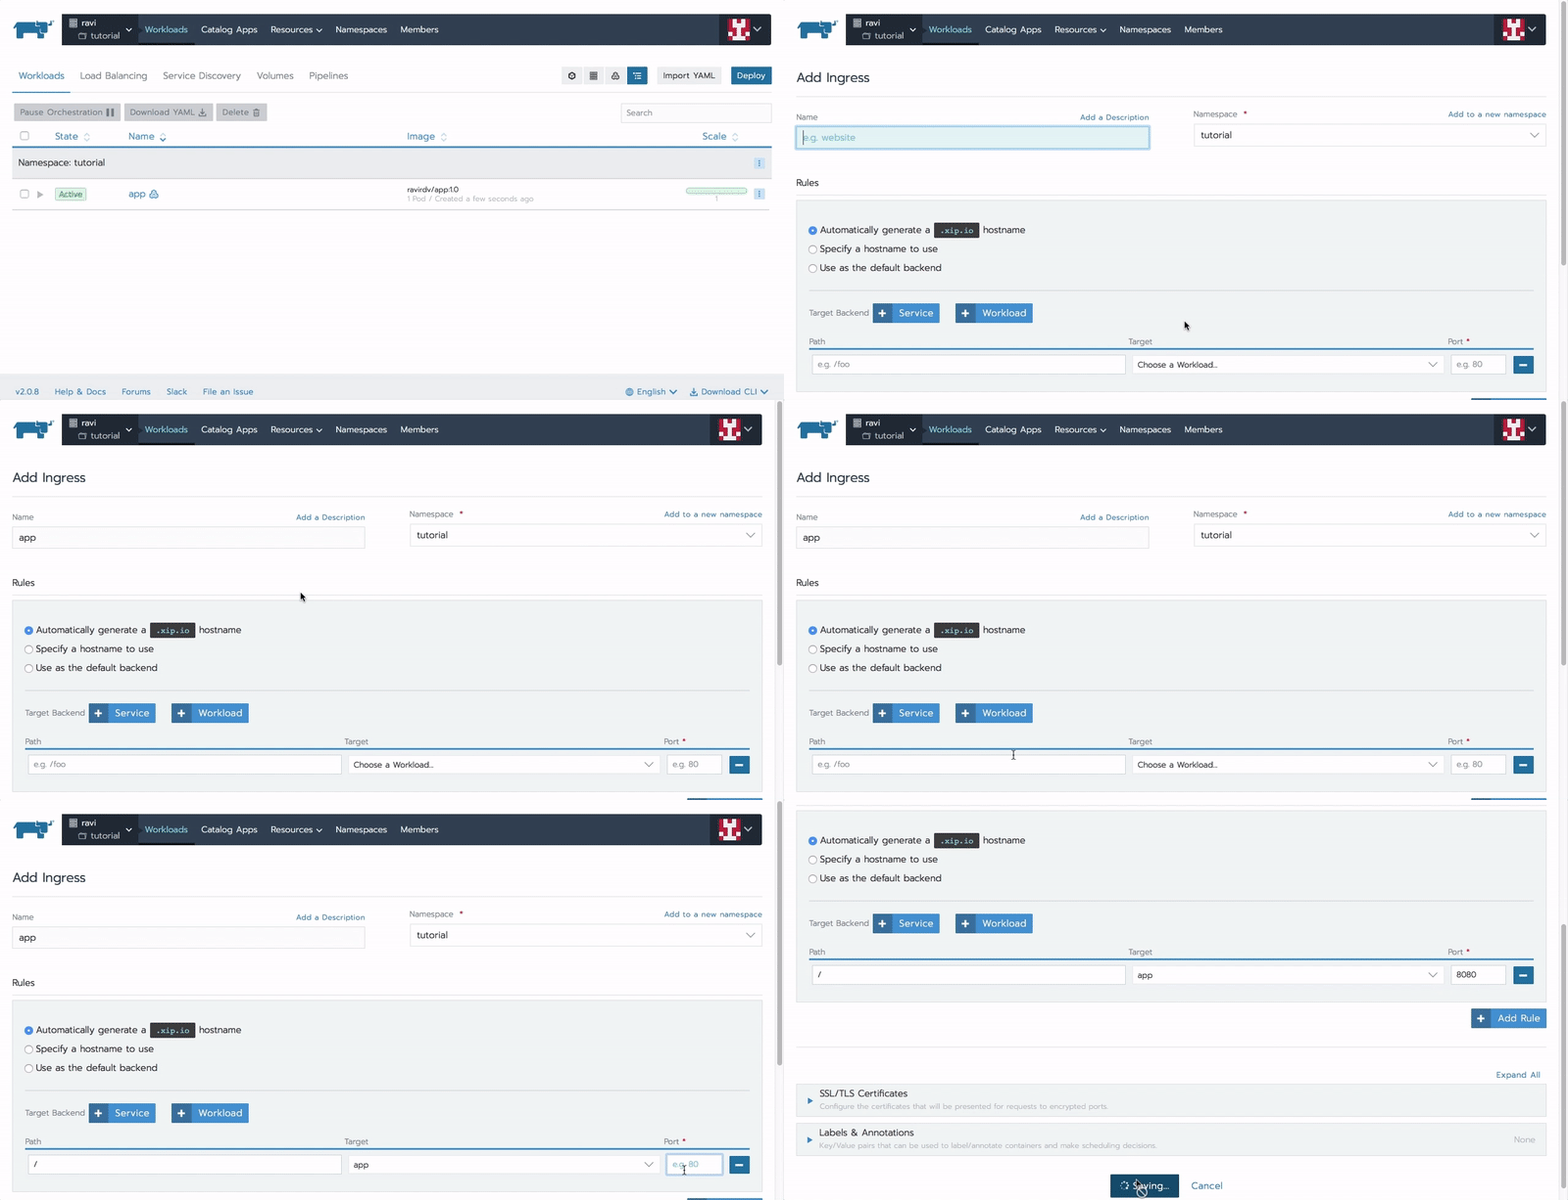
On Rancher, select your cluster, namespace and click on “Deploy”, specify service name, docker image and hit the “Launch” button to start a container.
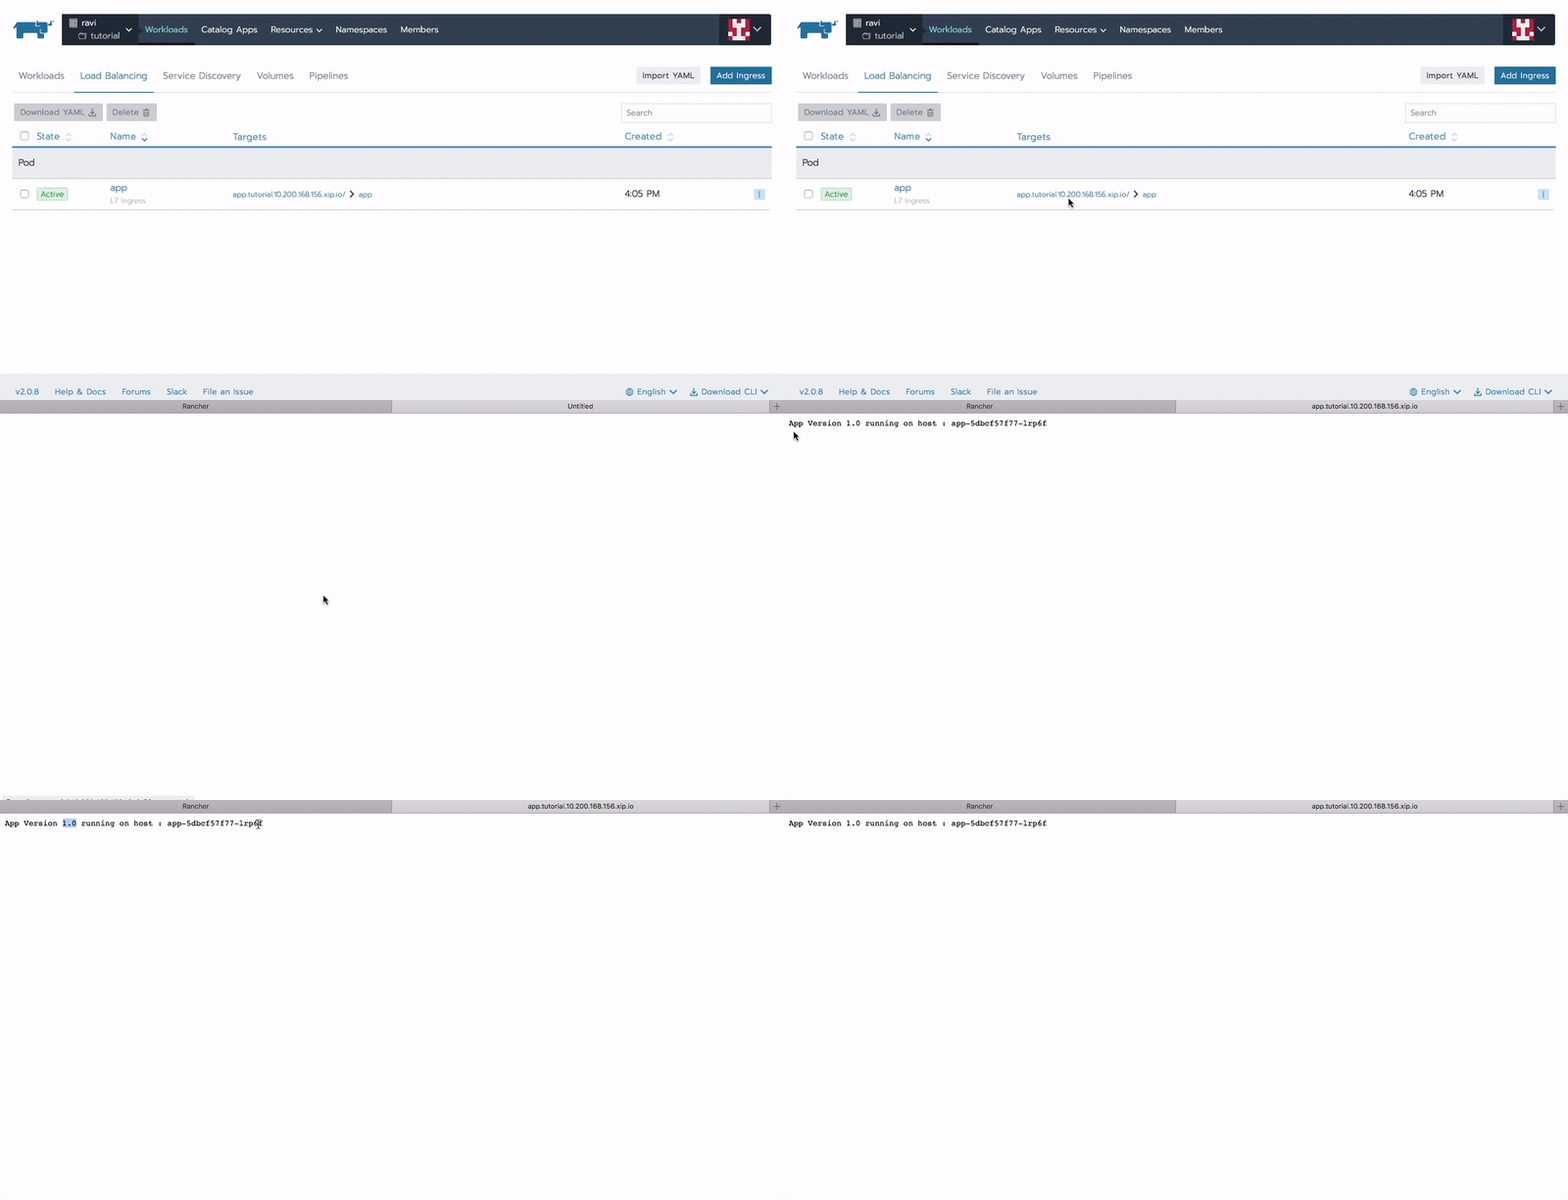
It will show the workload as active once the container is started. Now since our app is HTTP service running on port 8080, we need to expose this port to the external world. In order to do this, we got few options, first one is to bind container’s port 8080 to a random port on a node, another option is to attach an L7 load balancer to route traffic to our container. L7 Load balancer approach give you more flexibility. By default, Rancher deploys nginx to handle L7 traffic and it runs on port 80. Rancher also allows you to specify a hostname or generate a xip.io subdomain with your app name. In this case, it generated app.tutorial..xip.io and point its A record to out cluster IP.
You can map a path with this container and the port on which the container is listening. It takes around 20 to 30 seconds for it to generate xip.io hostname, you should be able to get a response from the endpoint once generated.
Now that we’ve got it up and running, let’s start a curl script to periodically make HTTP call to this service.
As you can see, we have got service version and container hostname as HTTP response, if you look closely all responses have the same hostname. That’s expected since we’ve got only one container running.
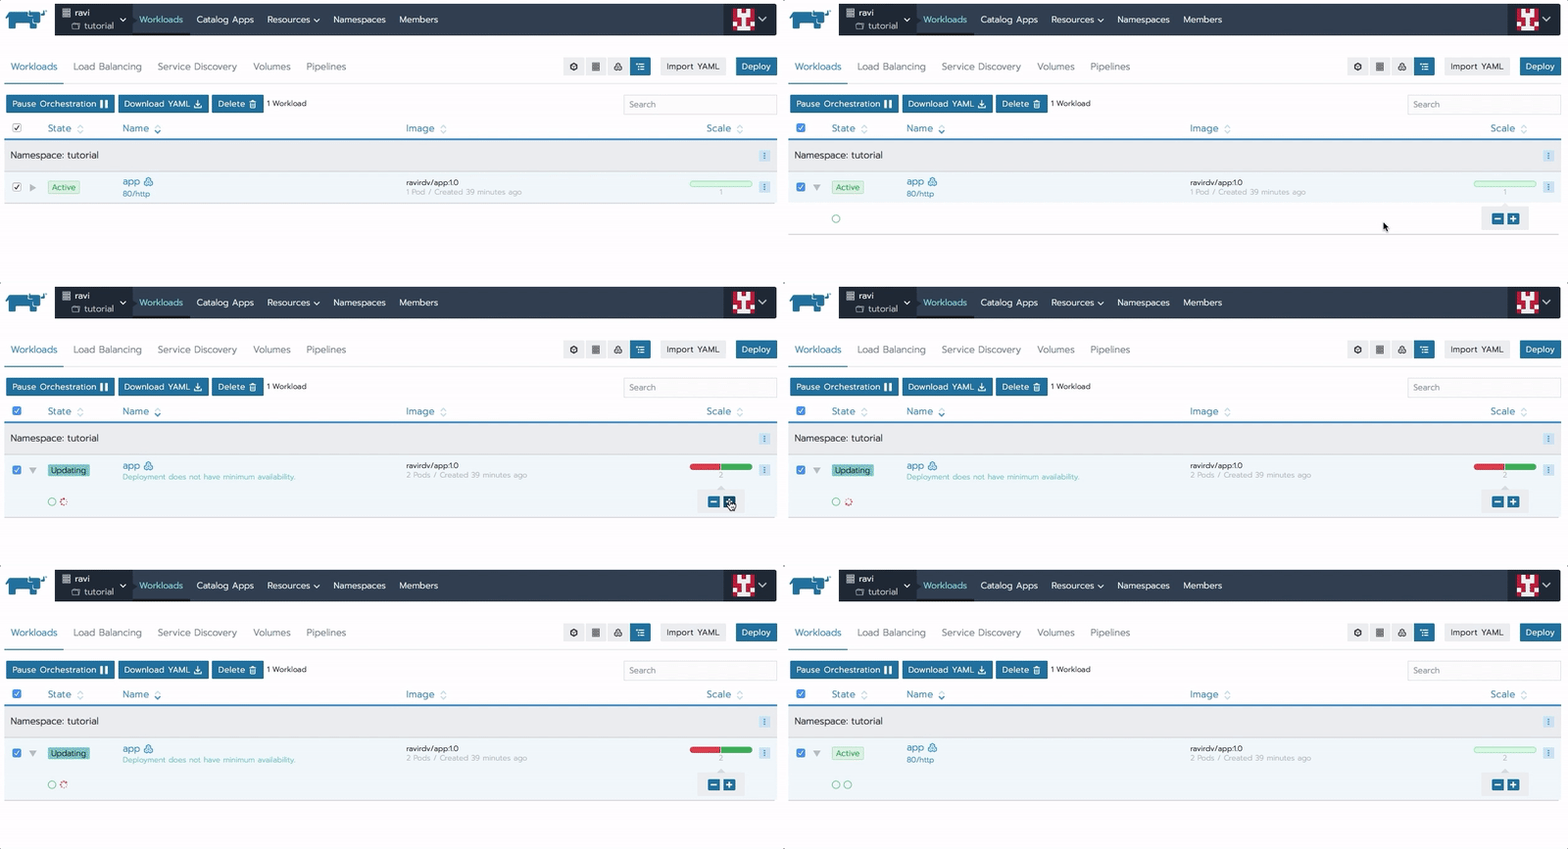
Now let’s look at how scaling container works. Since we’ve mapped our workload with the L7 load balancer, it should automatically take care of distributing traffic among our containers. You can edit the workload and increase the number of containers.
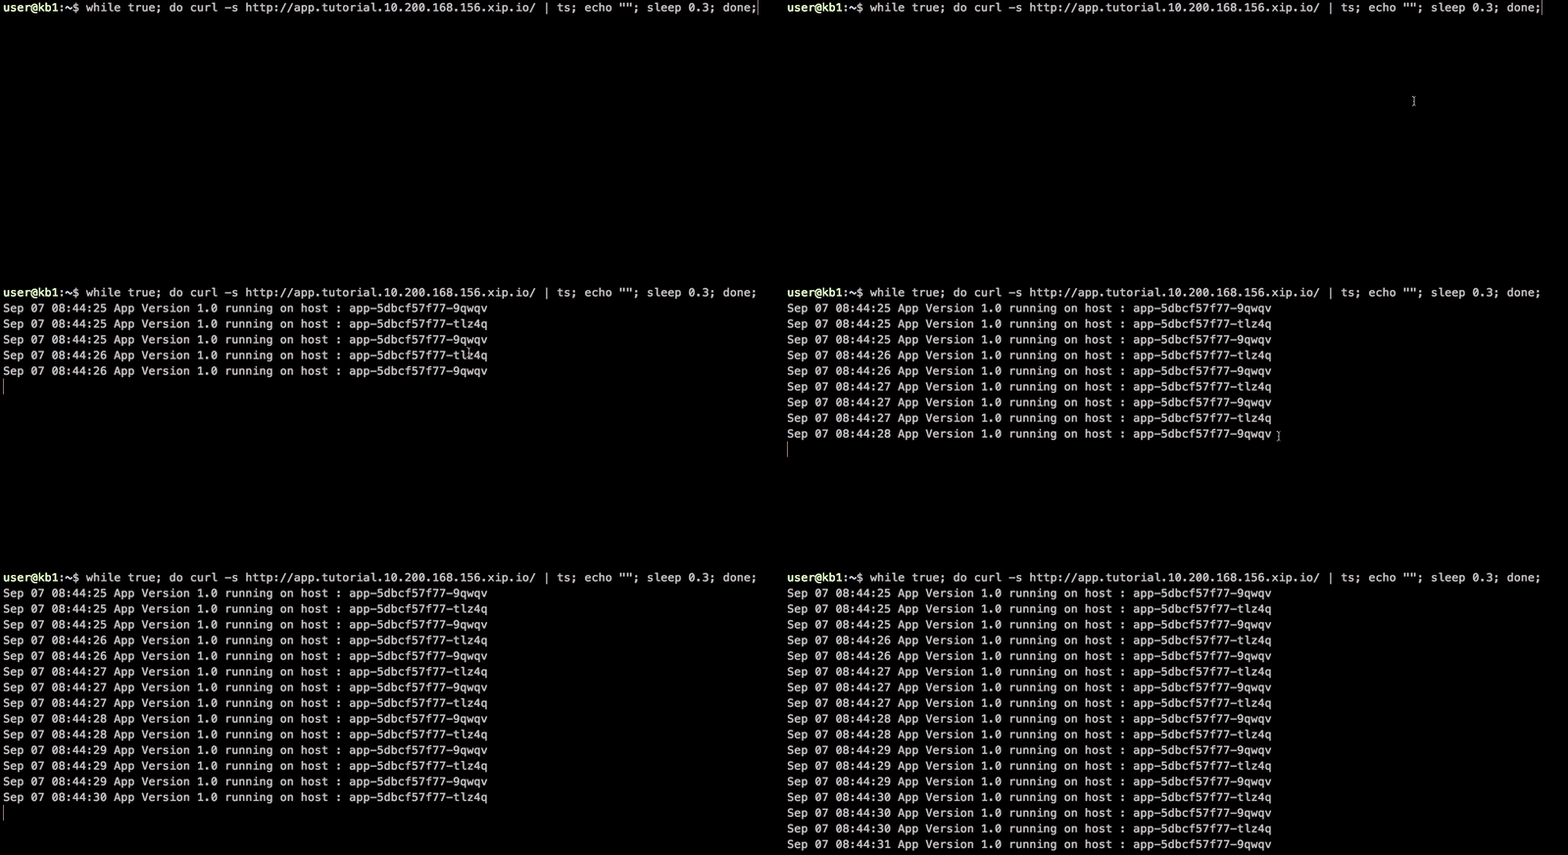
Now looking at same curl script output, we can see requests distributed between two containers as response contains two different hostnames.
Now we have a service which scales, its easy since our service doesn’t have any state. I’ll cover more on persistence storage for services like databases.
I hope this post helps you deploying simple stateless services on your cluster, please leave a comment in case something is unclear. In next post, we’ll look into how Rancher handles upgrades and rollback.
